
Elevating a Classic: The Chocolate Hobnob Cookie
- claudine bonsu
- 1 day ago
- 3 min read

Unpopular opinion, but the Hobnob is probably one of the best biscuits we have in the UK.
I’d say I’m more of a purist - I’ll always reach for the plain one, but I can’t deny the milk chocolate version has that little je ne sais quoi.
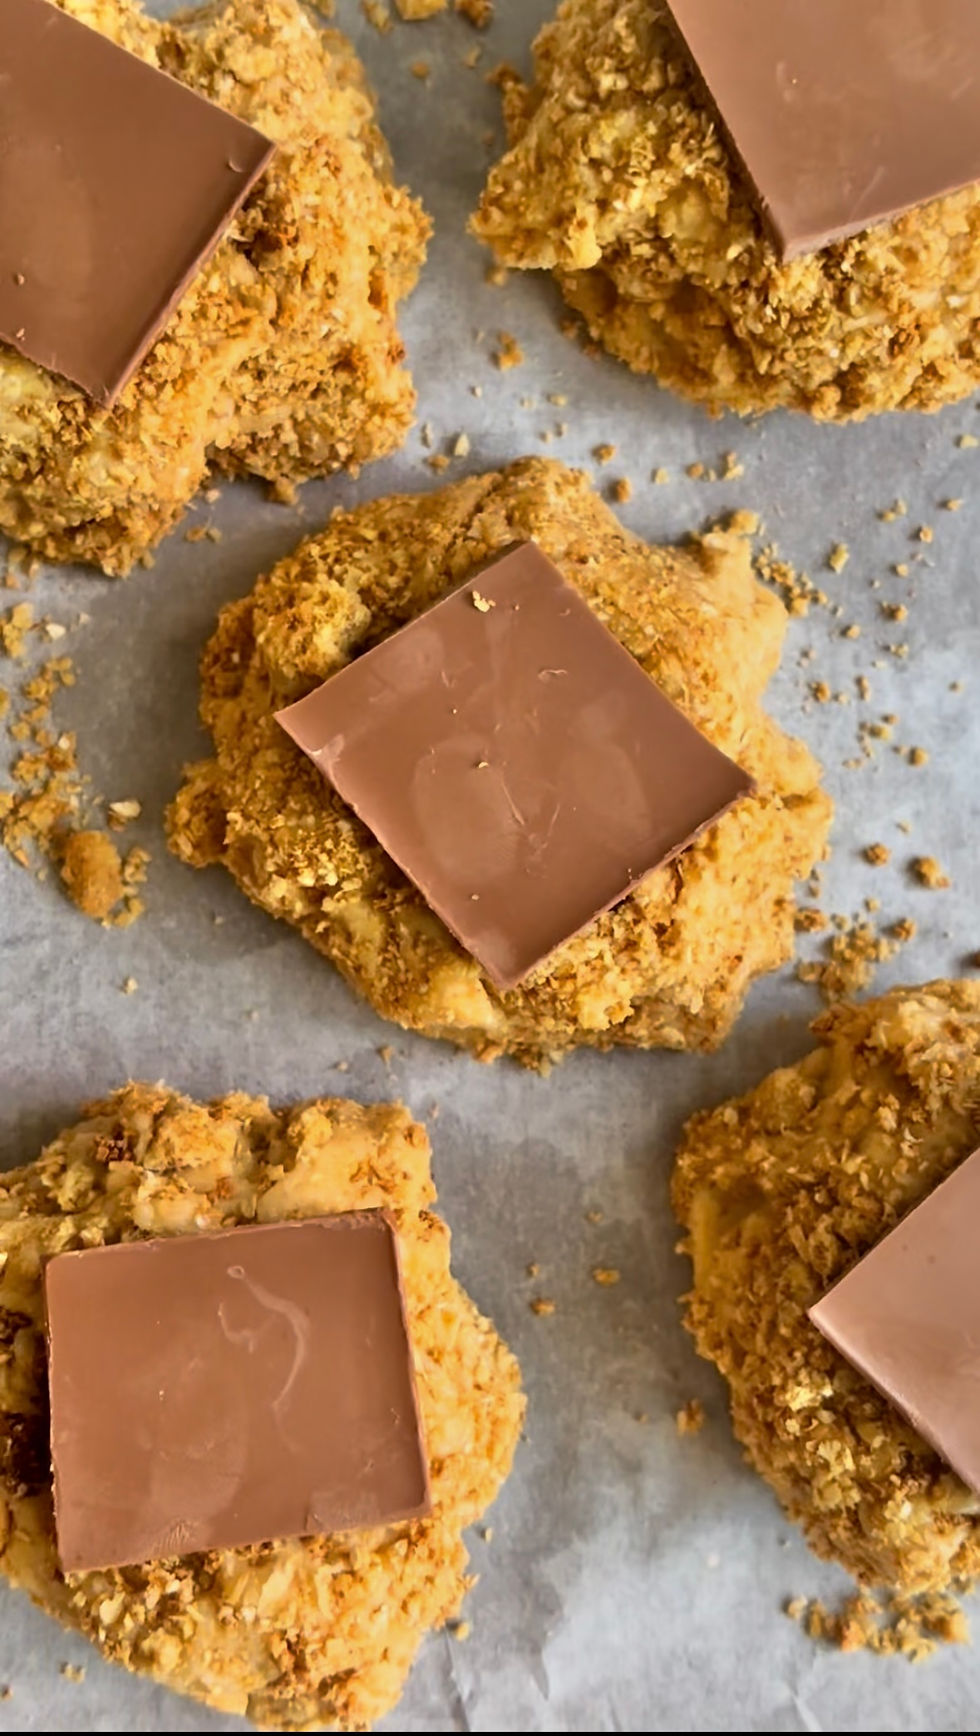
So of course, I was going to try and recreate that in classic Claudine's cookie's style. Oat Bran is the star ingredient here, to capture that signature Hobnob texture, toasted and brought together with golden syrup for that deep, familiar caramel flavour. And of course, it’s finished with a chocolate square before baking, and layer of milk chocolate after, because if we’re upgrading a classic, we might as well make it look the part too!

Recipe
Yields 8-9 120g cookies (adjust as needed)
Important Note: This recipe uses the pan-banging method, allowing for crisp edges but a softer centered cookie.
Ingredients
Cookie Dough
200g salted butter browed
2 ice cubes
180g light brown sugar
140g granulated sugar
40g golden syrup
2 tsp apple cider vinegar (ACV) or lemon juice
2 large eggs
½ tsp bicarbonate of soda
½ tsp baking powder
250g plain/all-purpose flour
1/2 pack of hobnobs
2 tbsp potato starch or cornstarch
2 tsp vanilla bean extract
Oat Bran mixture
100g oat bran
1/2 pack of hob nobs
30g golden syrup
Toppings
Milk Chocolate bars ( I used lindt chocolate)
70-100g of chocolate chips (for melting)

Instructions:
Preheat your oven to 347°F (175°C)
Brown butter: Melt the butter over medium heat until the milk solids turn gold brown and foamy. ( Once you hear the butter stop bubbling its time to take it off). Once off the heat, add 1-2 ice cubes and let them fully melt before popping into the freezer for 15-20 mins. When taken out, whisk the butter using a fork, to form a more firm butter mixture. ( this happens due to the coldness of the bowl from the freezer).
Mix sugars and butter: In a large bowl, cream together the brown butter with the sugars and golden syrup until combined ( don't worry if you have a few butter lumps in the mixture)
Add egg, vanilla and ACV: Add in the egg and vanilla extract and ACV, until well combined.
Combine dry ingredients: In a separate bowl, whisk together flour, baking soda, bicarbonate soda, potato starch and mix in the crushed hobnobs.
Mix dry into wet: Gradually add the dry ingredients to the wet mixture, stirring until just combined. Avoid over mixing to keep the cookies tender. ( hands are always the best for small batches!)
Cookie Size: Shape your cookie dough to 120g sized balls, and place a chocolate square in top of each dough ball. Set aside
Make the oat bran mixture: In a bowl, combine the oat bran and golden syrup using a fork. Lay on a parchment lined baking tray and pop in the oven for 20 minutes or until golden brown. Once cooled, transfer to a bowl and add in your second half of crushed hobnobs to the mixture.
Roll dough in oat bran mixture: Coat the cookie dough in the mixture
Chill the dough: Cover and refrigerate the dough for 2-4 hours.
Baking
Oven temperature: Preheat your oven to 356°F (175°C)
Baking time: Place your cookie dough balls ( about 3-4 each tray) Bake for 18 minutes. At 10 minutes, take your cookies out and tap your baking tray a 3-4 times on a kitchen surface. Do this again at the 13th, 15th and 18th minute mark . The tops will golden, with the edges crispy.

Final Assembly
Cool: Let cookies cool on the baking sheet for 10 minutes or until the bottoms of the cookies are firm ( you can throw them in the freezer for 5-10 mins to speed the process up)
Melt your chocolate: melt your chocolate on a plate (30 second intervals in the microwave - to stop them from seizing)
Add chocolate to cookies: Dip the bottom of the cookies in the melted chocolate, or use a knife, spatula to spread the chocolate on the them
Chill: Pop the cookies back in the freezer to set the chocolate and enjoy!
(These cookies are best served chilled/room temperature when the milk chocolate layer is set!)
Storage Instructions
Keep these in the fridge in a tightly sealed container until ready to enjoy. These can be kept for up to a week!
Experimenting with Variations
Once you master the basic recipe try these variations:
Biscuit variations: replace the hobnobs with digestive biscuits
Chocolate variations: Try this with lemon curd, or strawberry with a mint icing drizzle for freshness!
Are you a Biscuit lover?
Try my Rich Tea & Earl Grey cookies recipe here.


Comments